
How to turn a quiz into an arcade game in 10 minutes
Already have quiz questions in a document or LMS? This step-by-step tutorial shows how to turn them into a branded arcade game, publish it, and embed it for learners — no code involved.
The Arcadedo team, Gametize
4 min read

To turn a quiz into an arcade game, pick a quiz-based game template, paste or generate your questions, add a one-line explanation to each, brand it, and publish. With Arcadedo that takes about ten minutes, and the result is a link you can embed in Gametize or share anywhere. This tutorial walks through each step and the small decisions that make the difference between a game people finish and one they abandon.
What you need before you start
- Five to ten questions, each with one right answer and two or three plausible wrong ones. If you only have a policy or a slide deck, that is fine — AI can draft questions from a PDF, Word (.docx) or text file.
- Your logo (a PNG with a transparent background works best).
- An Arcadedo account. Anyone can sign up with email or Google.
Step 1: choose a quiz template
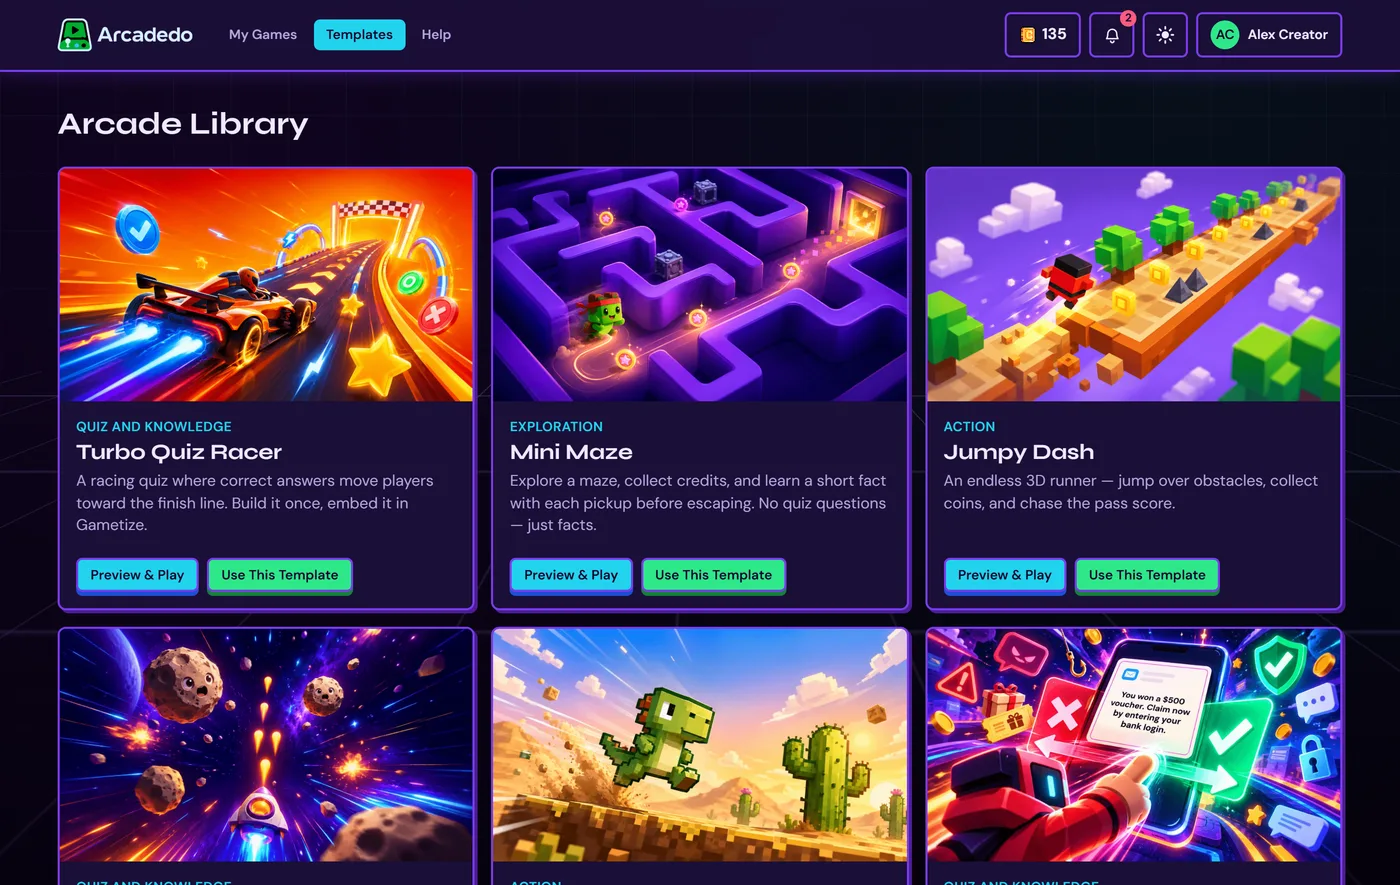
Every quiz-based template asks the same kind of question but feels different to play:
- Turbo Quiz Racer — answer at each checkpoint to move your car toward the finish. The safest choice for compliance and onboarding.
- Checkpoint Rush — a pixel highway racer where each lane is an answer and players drive into the right one.
- Space Shooter — shoot stars to trigger questions between waves.
- Dino Run — every golden egg asks a question.
- Star Match — a match-3 board where questions ride on star tiles.
Open the template, click Preview & Play to try it, then Use This Template. Your own copy opens in the editor. Not sure which to pick? See choosing the right template.
Step 2: add your questions
In the Content step you can add, edit and reorder questions by hand. To start from a document instead:
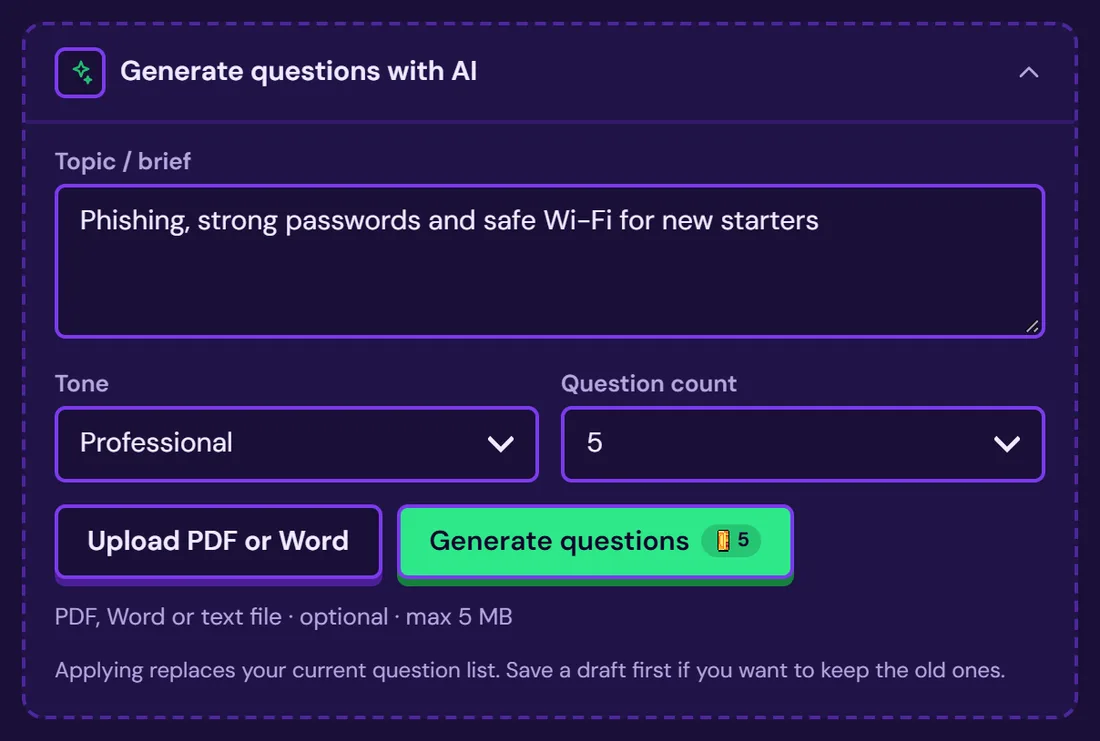
- Click Generate with AI.
- Describe the topic, or upload the source file (up to 5 MB).
- Choose a tone and how many questions you want.
- Click Generate questions, then review every one.
Generating replaces the current list and costs 5 credits per batch — refunded automatically if it fails. The full walkthrough is in Add questions or facts.
Write wrong answers that teach
The wrong options are where most of the learning happens. Make them the mistakes people genuinely make — the outdated rule, the almost-right number — rather than obvious jokes.
Step 3: add explanations
After each answer, players see a short explanation. Keep it to one sentence that says why: "Report it within 24 hours — the regulator's clock starts when you find out, not when you confirm." This is the single highest-value thing you can add to a learning game.
Step 4: brand it
In the Brand step, upload your logo and click From logo to pull your colours from it, or Suggest to have AI propose a palette. Hover a colour to see exactly where it is used. See Brand your game.
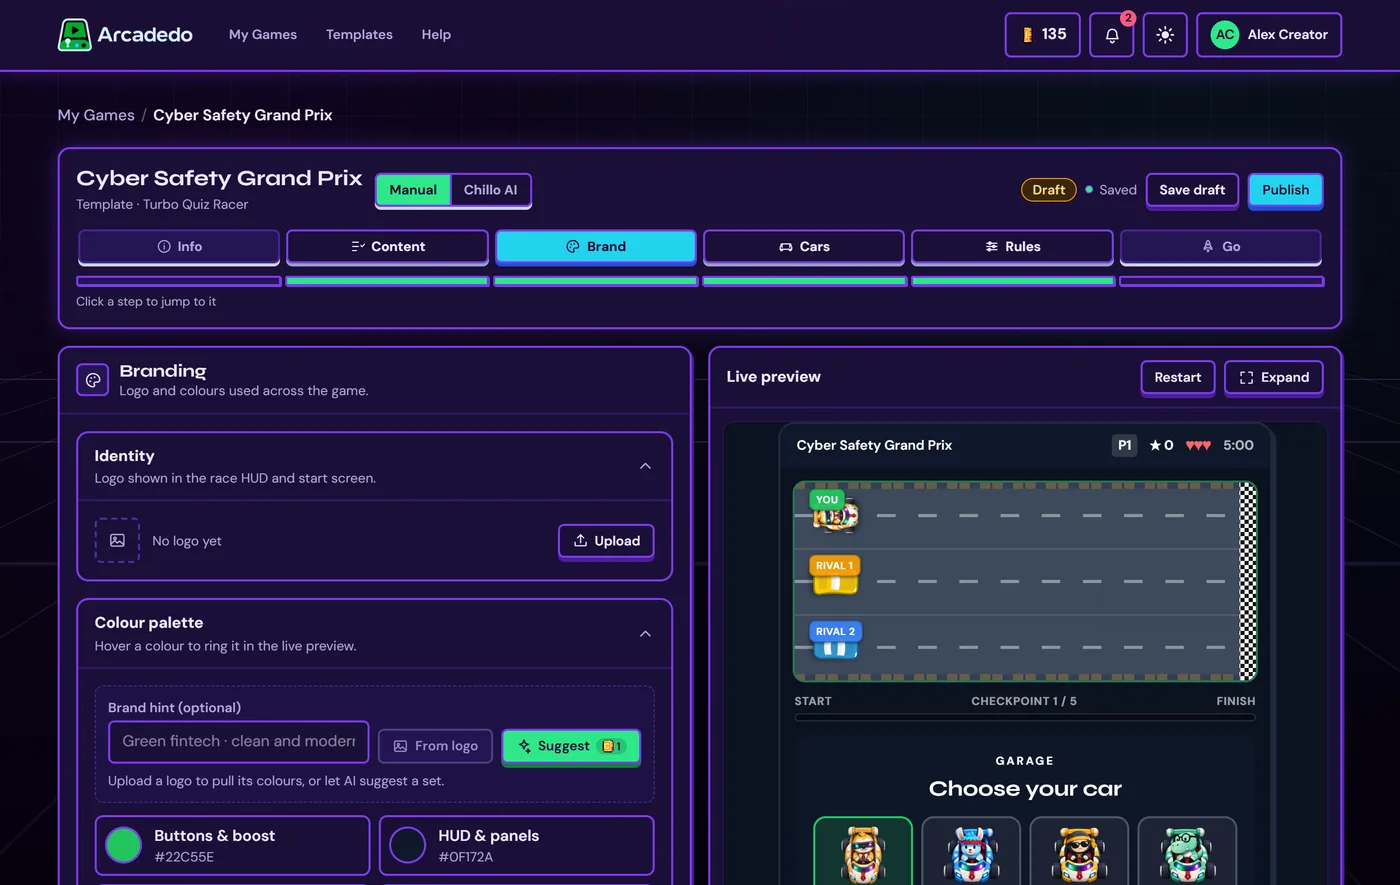
You can also swap characters and artwork for your own, or describe one and let AI draw it — see Change characters and artwork.
Step 5: set the rules
In Rules, choose how many lives players get and the score they need to pass. A pass mark of around 70–80% keeps the game winnable while still meaning something.
Step 6: publish and embed
Open the Go step. Anything still missing is listed at the top; once it is clear, Publish turns green. Then:
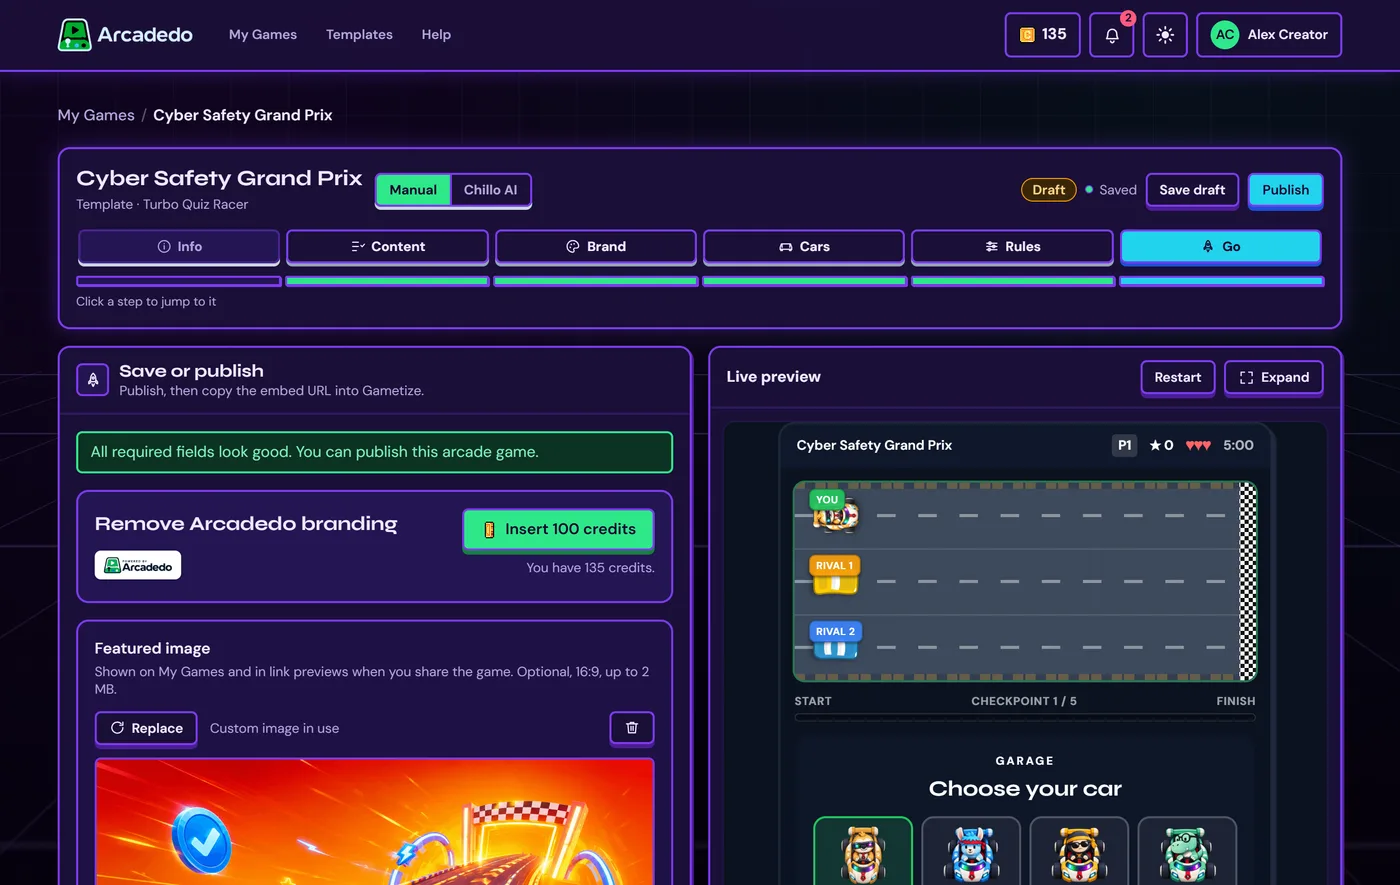
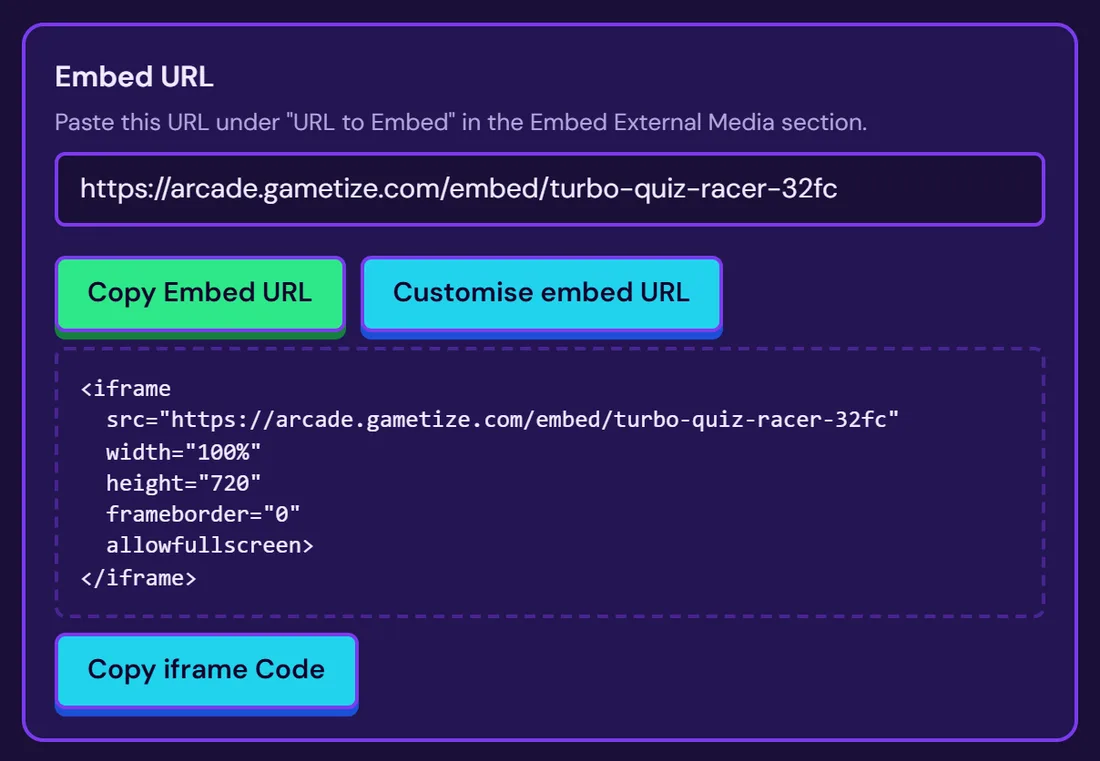
- Copy the embed URL from the Go step.
- In your Gametize campaign, open Embed External Media.
- Paste the link under URL to Embed, preview, and publish.
Full details: Publish your game and Embed in Gametize. The same link also works on its own in Slack, Teams, WhatsApp or email, with a preview card showing your featured image.
Step 7: improve it with analytics
Once people have played, the analytics page shows which questions are missed most. Rewrite those questions — or the training material behind them. You can keep editing after publishing; players on the same link get your changes.
Prefer to describe it instead?
Switch the editor to Chillo AI and describe the game in plain words — your audience, your brand, the topic. Attach a logo or a document, and Chillo fills in the steps for you. See Set up with Chillo AI.
Frequently asked questions
Can I import questions from my LMS?
Export them as a document (PDF, .docx or text) and upload it in the Content step; AI will turn it into questions you can edit. You can also paste questions in by hand.
How many questions should a quiz game have?
Five to ten. Fewer than five feels thin; more than ten makes a run long enough that people stop replaying, and replays are where the practice happens.
Can I change the game after it is published?
Yes. Edits save automatically, and players on the same link see the changes.
Does it work on phones?
Yes. Every template is built to play in a browser on desktop and mobile, including inside an embedded frame.